Feather Project
Download Printable Instructions
Step 1Begin by forming the small and large feather shape with yellow dough. Feel free to work in some additional detail to the top of the feather. |
 |
Step 2Once you have your feather shapes created, cut the large feather in half and add in detail to both feathers. |
 |
Step 3Make the center shaft with white insulating dough. Place the shaft between the two large feather halves and join the three pieces together. |
 |
Step 4Next, attach the long legs of the LEDs to the right side of the large feather, with the smaller legs going into the left side. |
 |
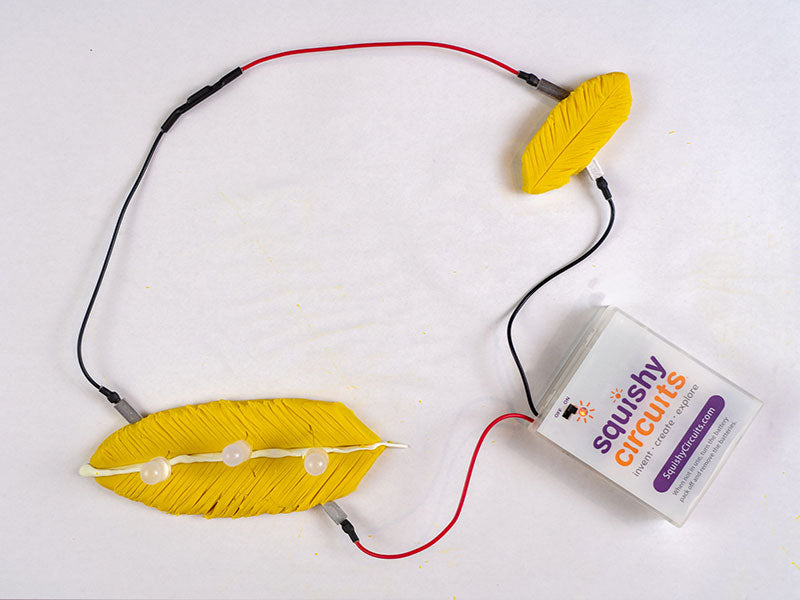
Step 5Build out the circuit using the battery holder and reed switch. Insert the red terminal from battery holder into the left half of the large feather and the black terminal into the right side of little feather. With the reed switch, insert the black terminal into the right side of the large feather and the red terminal into the left of small feather. |
 |
Step 6To flow power through the circuit and light up the LEDs, simply touch the magic wand to the magnets of the reed switch. Make sure that the battery holder is turned to the on position to ensure power can flow through the circuit. |
 |